Building a cheap Raspberry Pi mini arcade cabinet
This is part 1 of a series in which I ’ll be building a Raspberry Pi-powered mini arcade cabinet. Check back here for a link to part 2 when I have written it.
I ordered my Raspberry Pi a few months ago, and it’s been sitting on my desk pretty much collecting dust ever since. I had some vague ideas about using it with RetroPie to be the brains in some sort of arcade machine. But what sort of arcade machine would that be?
There are some great guides out there for building your own machine from scratch, but as I don’t have access to sophisticated cutting machinery, they seemed a step too far. I also came across some fairly nice looking pre-built kits, but they are all relatively expensive. I’m just after a bit of fun; not a major investment!
Then I came across this post on Reddit, where user Zero1O1 had used an iCade as the basis for a little Raspberry Pi-based MAME cabinet. If you’re not aware of the iCade, it’s a cabinet that accepts and pares with your iPad using Bluetooth, and allows you to play supported games using the built in arcade stick and buttons.
According to the guide, we'll be needing the following parts to complete our project:
- Raspberry Pi (I have the model B+, but the model B should do)
- An ION iCade
- LCD screen with power supply
- USB controller board for the joystick and buttons
- USB speaker for sound output
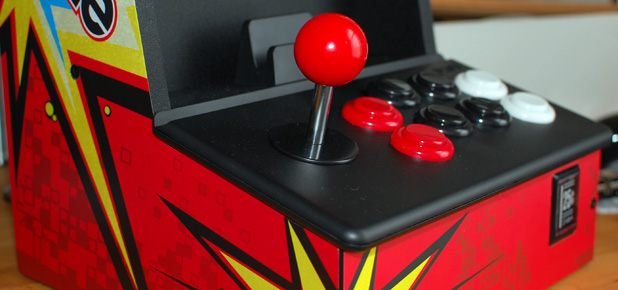
ION iCade
iCade’s can be had really cheaply on eBay these days, but I snagged mine on Amazon UK for only £30. Click here to see it Amazon.com. It really is amazing value as you’d struggle to buy just the arcade controls for that money. The iCade arrived in due course and I wasted no time in getting it set up. Here’s my son having his first ever experience of Pac-Man on the iCade (using it with the iPad in its normal configuration):
https://www.youtube.com/watch?v=0IYZMN9uEWE
The screen
In his guide, Zero101 ordered this 10.1” screen from Adafruit, which certainly looks like a nice bit of kit, but is quite pricey at $145.00. Instead, I opted to purchase this screen from DealExtreme for a much more palatable $75.00. DealExtreme ships for free from China, but it does take a while to arrive. We’ll have to see if the quality is up to snuff. My other misgiving is that the screen will be a little too big at 10.1”. There’s definitely enough room for it in the iCade cabinet; I’m just worried it will appear a little cramped. If it really doesn’t work out, I might have to opt for the 7” version instead. Both screens come with a controller board supporting multiple inputs, including HDMI, which should make it really easy to connect to the Raspberry Pi. And both screens require a 12V power source to run. I think I have one lying around, but I’m going to try and find out if it’d be possible to run both the Pi and screen from the same power source. It’d be much nicer to just have the single power cord running into the cabinet.
USB controller board for the joystick and buttons
While it is possible to wire the iCade joystick and buttons directly to the GPIO pins on the Raspberry Pi, I've opted to go for a dedicated controller board that connects to the Pi via USB, and has connectors for all the iCade's buttons and more (might be nice to add some buttons on the side for some Pinball action). I found this one on eBay, which seems to fit the bill.
USB speaker
Any old USB speaker will do, but the smaller the better. These little capsule speakers are really compact, so should do rather nicely.
What’s next?
In the next part of this series, we'll take a look at the various bits I've purchased and see if we can get them all working together.
—
Posted Wed, 20 Aug 2014 - 14:53